installing Deck Footings For Above Ground Pool Decks does not have to be a hassle
How a weekend diy'er installed six deck footings for an above ground pool deck - in 45 minutes
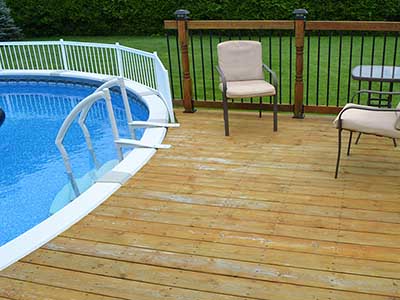
Every above ground pool needs a deck. And that usually means lots of deck footings simply because the deck typically wraps around half the pool.
All of this means tons of work - digging and mixing cement, as well as tons of money.
Built to take a beating and still perform
This deck was built in 2013 and has endured many cold snowy winters and hot sticky, wet summers. But to this day, it still looks fantastic, and the footings have not budged an inch.
Brian is from Ottawa, Ontario, Canada where the weather goes from extreme cold during the winter months (33°F) to extreme hot humidity during the summer months (77.5°F).
So, even if you have big seasonal temperature swings do not worry. If your soil is stable or consists of decent clay you can have confidence with the Deck Foot Anchor™ system.
about the builder
Brain, built a beautiful above ground pool deck with six Titan Deck Foot Anchors which he installed in less than an hour - forty-five minutes to be exact!
He's a talented race car builder and mechanic
Brain is quite the accomplished mechanic. He has been building race cars from the ground up since he was fifteen years old!
Needless to say, he is quite comfortable managing any kind of building project. We do not doubt for a second that it only took him forty-five minutes to install the Deck Foot Anchors.
but decided to build his own above ground pool deck
Even though carpentry is not something Brain has spent much time doing we are thrilled he decided to give the Deck Foot Anchor™ system a try. Given the success he had when building his pool deck and his willingness to participate in this case study we are confident he feels the same way.
brian is probably no different then you.
Brian just wanted to have a nice attractive, solid deck to compliment their above ground pool and he wanted to do it on his own in order to save a few dollars.
But just as importantly, Brain wanted to know that the deck would stand the test of time and be stable around the pool. And, that is exactly what he got.
A big bonus was that Brian didn't need to break his back digging holes and he avoided the cost and mess of using cement. And best of all it took less than an hour to have all six footings in the ground and he was ready to build.
How many footings will you need for your deck?
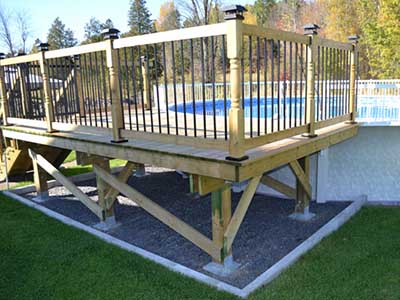
To determine the number of footings you will require for your project we recommend using the manufacturer's 'Rule of Thumb' and plan for one footing for every six feet. This deck was sixteen feet wide and about ten feet deep. Brian decided to space the footings a bit further apart and used six Deck Foot Anchors™.
Floor decks are supposed to support 50 psf. So a 6'x6' tributary area above each footing times 50 psf equals 1800 psf per footing. That matches up nicely with the average soil bearing capacity of 1800 psf.
prepare the job site properly for the deck foot anchor™
Brian did a really nice job of preparing his job site. He removed the sod and two inches of loose soil and made sure that there was no organic debris that would eventually rot.
He laid out landscaping fabric, put down three inches of ½" or smaller crushed stone to protect against erosion caused by heavy rain, and he also installed a concrete block perimeter. Which made for a really clean look.
This last step is a bit more important for an above ground pool deck because the support structure is almost always visible unless you plan to install a lattice skirt around the deck.
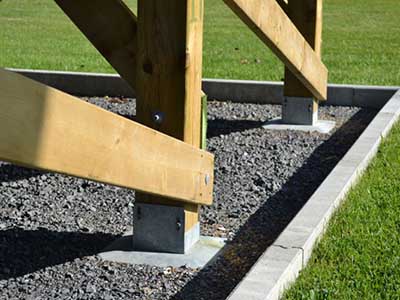
Bracing between posts and beams
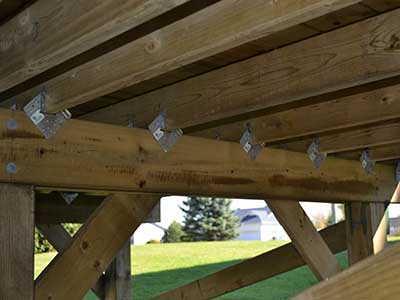
Free standing decks will require bracing between posts and from posts to beams. This eliminates any sway and creates a finished structure that is rock solid.
You can see from this photo showing the underside of the deck framing how the beam is braced to opposing support posts and then each post along adjacent beams is braced in the alternating direction. This deck will never move and that is critically important given that an above ground pool is in close proximity to the decking.
Framing Technique Near Pool Edge
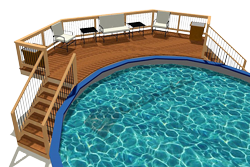
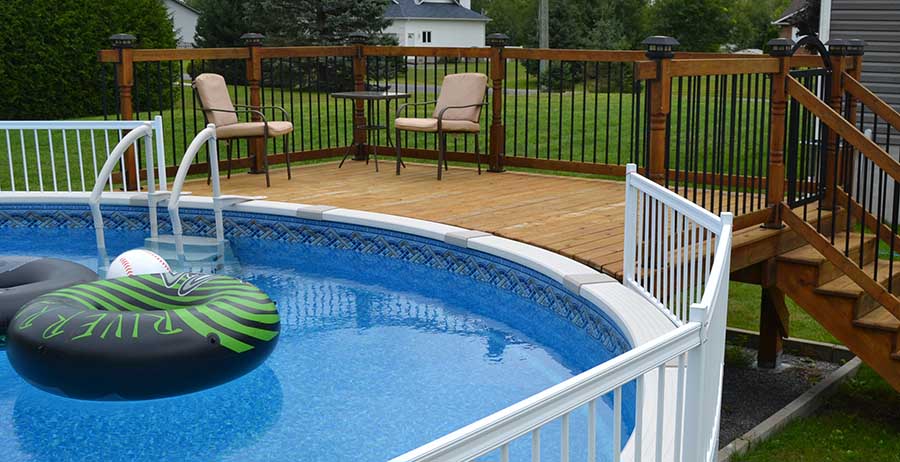
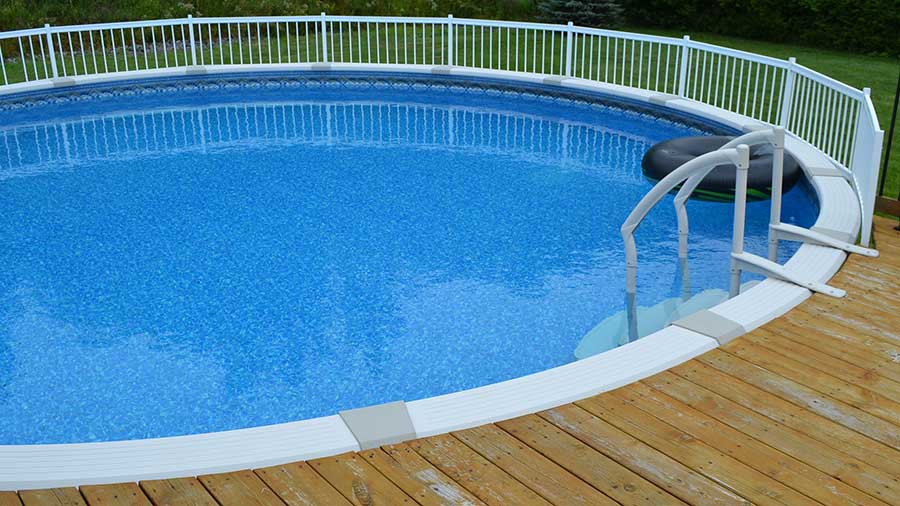
Notice the technique used to frame the deck around the pool. This pool had a 24' diameter and so the deck had to follow it closely but still be about an inch away so that any movement of the deck over the course of the seasons would never cause damage to the pool.
The framing solution involved extending the lengths of the perimeter beams longer than the middle beam. Then 2x8 joists were framed in at a slight angle that closely followed the radius of the pool. Deck boards extended beyond the joists and were cut to the final length using a jig-saw.
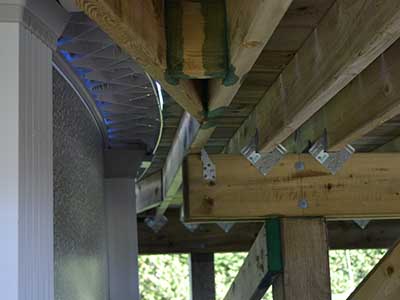
Connecting beams to support posts and joists to beams
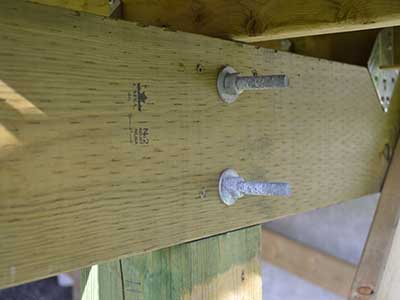
Nice beam to post trick
To really make the entire deck structure strong, Brian notched a rabbet cut out of each 6x6 post and set the 2x8 beams on the flat cut.
This transfers all the weight of the deck directly onto the post and it is the right way to build. The ½" carriage bolts and washers are the final piece in the puzzle and then secure the beam to post.
Since this is a free standing or "floating" deck, the structure should be built to remain stable and rigid and merely rest on the Deck Foot Anchor™ below it.
stronger than a locomotive!
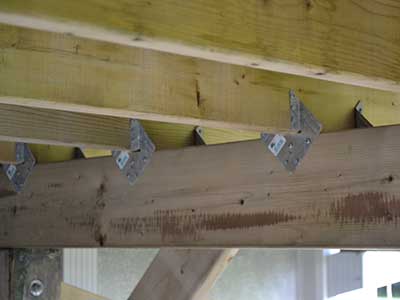
Rather than merely "toe-nailing" the joists to the beams, joist to beam clips were used on both sides of the beam as you can see in this photo from underneath the deck.
Brian may be a developing carpenter but his attention to detail from his automotive and mechanical skills comes through here. He built this above ground pool to last in every way.
Add a gate for security around the pool
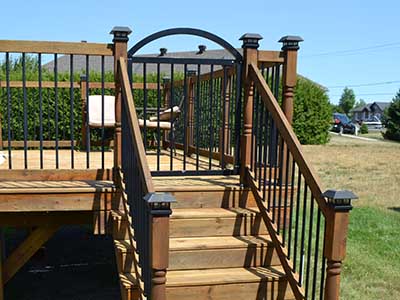
An aluminum gate with hardware added a nice security element to Brian's deck and complimented the balustrade, caps and post anchors. This gate was 36" wide.
An aluminum framed gate is very lightweight and a better idea than trying to build one from dimensional lumber. It also never warps or twists like a wood gate might tend to do over time.
simple but classic looking aluminum balusters, caps & connectors
If you are trying to achieve a classic look without breaking the bank, do what Brian did.
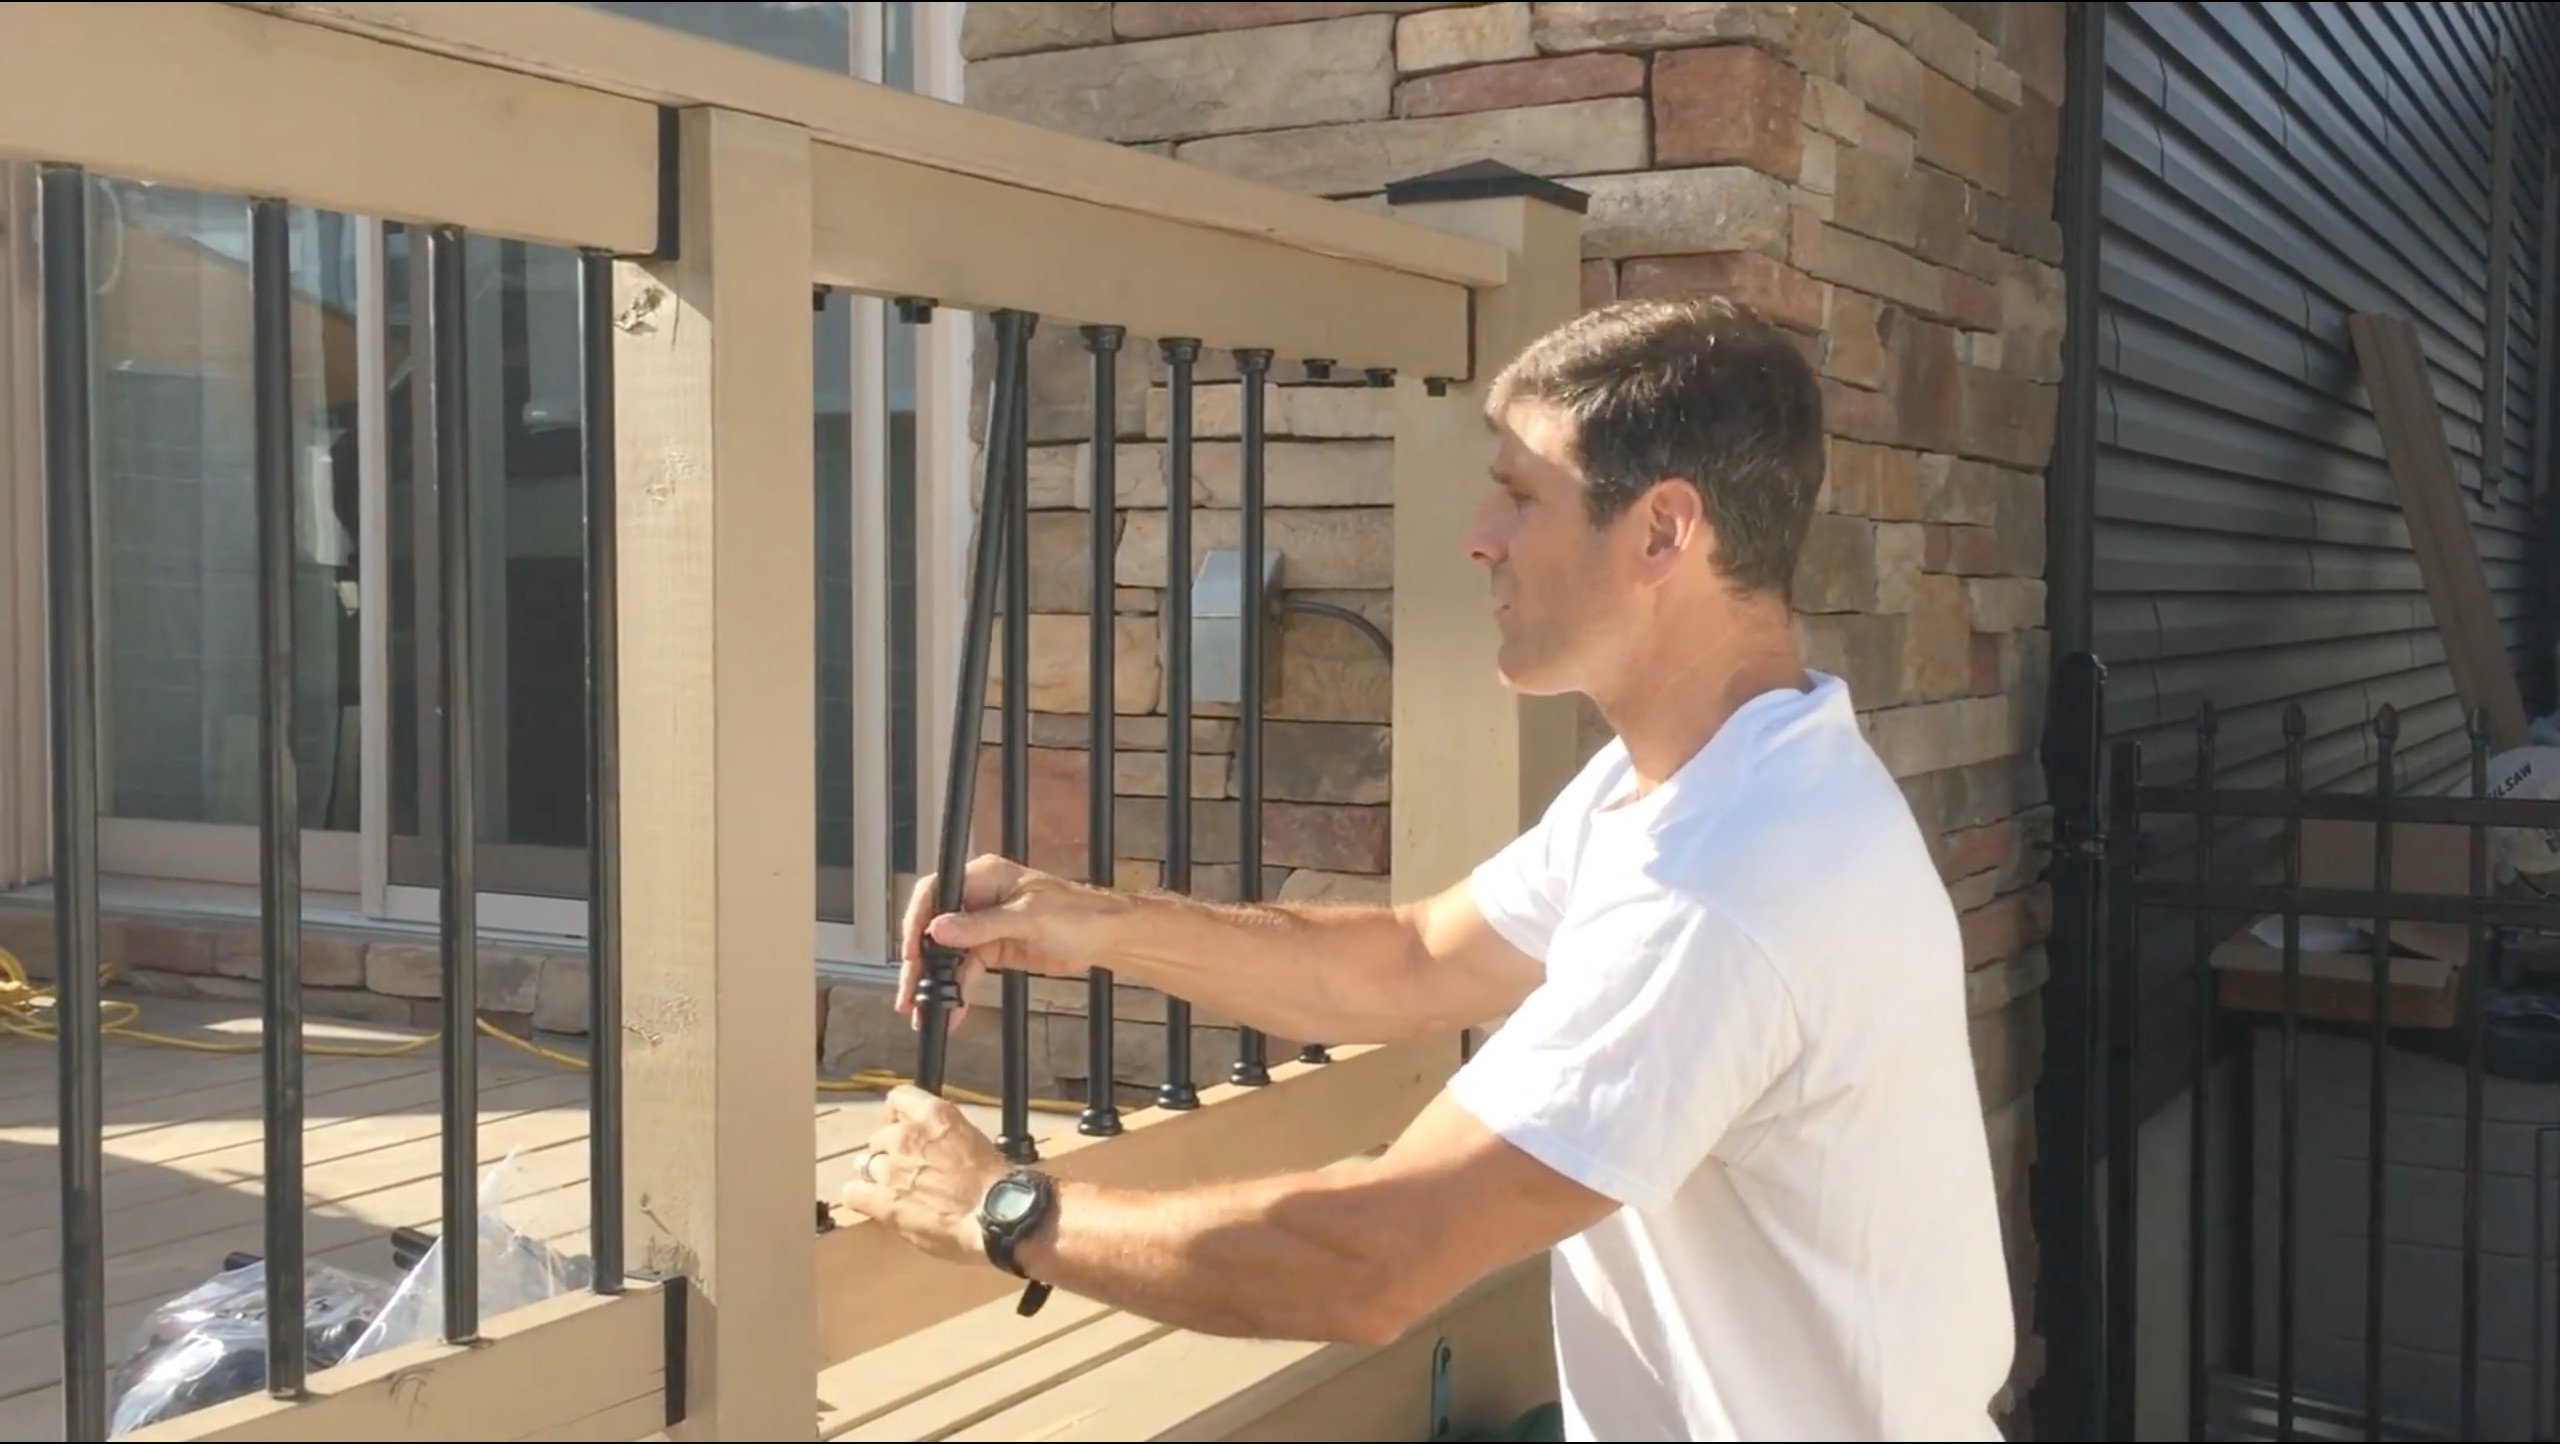
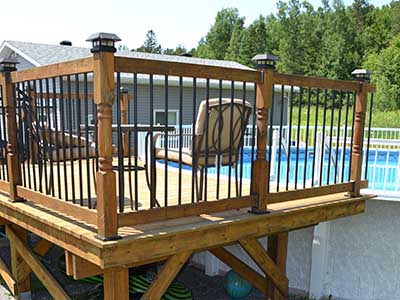
Here you see he used 3/4" diameter black aluminum balusters and black solar post caps. He also used turned 4x4 posts which added a bit more elegance to the final appearance.
Brain installed these surface mounted posts with the Titan Wood Post Anchor™.
Six years later... A durable long lasting post to deck connection
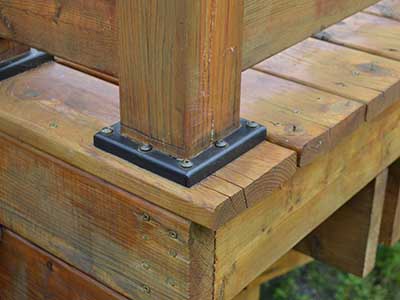
This surface mounted post anchor, the Titan Wood Post Anchor, was a perfect and easy solution for anchoring the railing posts to the decking. No notching the deck boards around each post saved Brain a ton of time and it also means the ends of the deck boards are not cut and therefore compromised to weather conditions.
A flat 2x8 blocking board was secured in the joist bay below each post and posts spacing came out to around 5'-4". The manufacturer states 6' on center is the maximum for residential jobs.
let's go swimming!
You can bet this pool gets a lot of use and brings lots of smiles, laughs and relief from the hot Ottawa summers!
If you have an above ground pool and you want to build a pool deck around it to get maximum use please keep these building solutions in mind.
why Brian used the deck foot anchor instead of deck blocks
Above ground pool decks pose unique challenges for builders and homeowners alike who soon find out that pool decks tend to require a lot more footings than a common deck. And that is because pool decks tend to wrap around the pool therefore, necessitating more footings.
Less time, less labor, less money, less mess
Brian decided that the time, the labor, the money, and the mess was just not worth it for a common above ground pool deck. For approximately $350 he had his entire footings installed in less than 45 minutes and he was ready to build.
Six years and performing like a true champion
This deck has been standing for six years now and has shown no signs of movement and keeps on performing well. Definitely a good investment for years of summer time enjoyment.
A project like this is within your reach
We feature real customers that placed their confidence in us and used the Deck Foot Anchor and took the time to reach out and contact us to tell us about their experience. Hopefully this case study has helped you out.
It's alright to feel excited. You should be. This kind of a project is within your reach. Now go build that deck!
Home > Deck Foot Forum > Case Study: Above Pool Deck Footings
