build a boardwalk with deck foot anchors
a PENNSYLVANIA builder sAVEd TIME AND MONEY and replaced and rebuilt a rotting wooden walkway
This is a real case study of a how a contractor decided to build a boardwalk with Deck Foot Anchors - one hundred and fifty to be exact.
water destroyed the original boardwalk
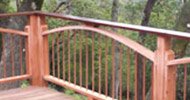
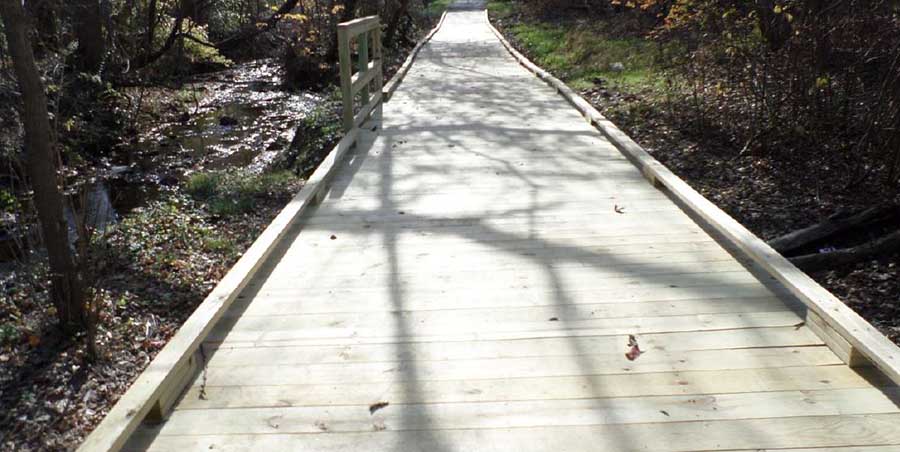
This beautiful rebuilt wooden boardwalk is 8' wide and 400' long. It meanders alongside a stream near a golf course and is vulnerable to water.
The original walk way used 4x4 treated posts sunk into ground and they were badly deteriorated.
Tough enough to withstand the elements
The Deck Foot Anchor™ has been compression tested to a minimum of 19,000 lbs. That is far more than the typical 1800-2000 psf that soil can bear.
And the heavy hot dipped zinc coating gives the footing the best protection to water and corrosion next to stainless steel.
about the builder
Jim is from Chambersburg, PA and his company R.A. Hill Inc. has been in business a long time.
how to build a boardwalk over wet land that would last?
When his company was asked to consider rebuilding a rotting wooden boardwalk over wetlands near a local golf course he started thinking about a solution.
Some jobs must use concrete. There is just no way around it. But what were the options other than concrete?
ONe hundred footings will make anyone think twice
One hundred and fifty footings is enough to make anyone ask themselves what the most economical and reliable solution is other than digging and pouring cement.
Thankfully, a wooden boardwalk like this was a good candidate for a surface resting ground anchored footing like the Deck Foot Anchor™. Jim also had a good idea about the type of soil he was dealing with.
this boardwalk was rotting and in bad shape
The walkway was set low to the ground and upon inspection it was found that structure was in poor condition. The first step Jim's team took was to remove the decking and get a close look at the frame and support posts.
But the obvious concern was how to prevent this kind of damage in the future. How do you build a new wooden walkway without concrete footings and the whole job costing a fortune? Was it possible to build a boardwalk with Deck Foot Anchors?
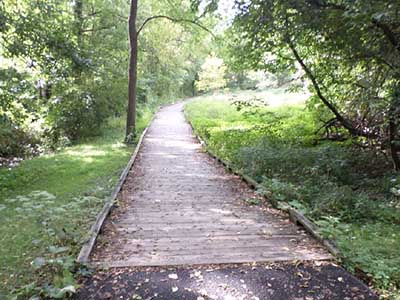
Thoroughly inspect the deck framing, foundation and support posts
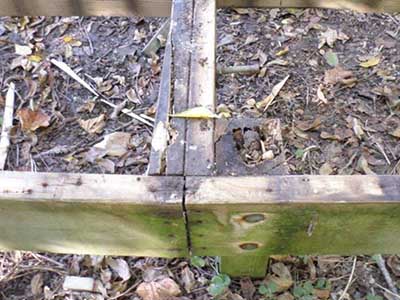
Once the deck boards were removed the real situation was revealed. Many joists and posts were rotting and beyond repair. A significant rebuild was required. But notice also some rookie building mistakes.
The joists were attached to the sides of the support posts. Any future rebuild would ensure joists were connected with hangers or would rest direction on top of a beam.
the full reveal of the structure told the story
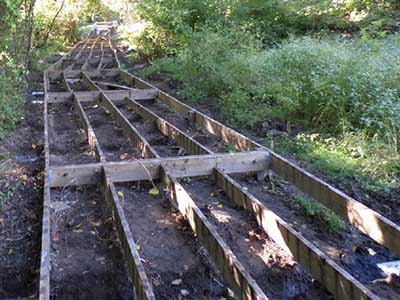
The entire walkway had been quickly constructed. Sixteen-foot joists were toe-nailed to perimeter joists which were in turn were affixed to the sides of posts set entirely in the ground. It was amazing this boardwalk lasted as long as it did.
From the first look, Jim tried to save the joists and posts. His idea was to use the Deck Foot Anchor to support two beams between each of the old posts that were sixteen feet apart. Jim had his crew install one hundred anchors for those beams.
But unfortunately, it became clear that the existing posts were in such poor condition that they were going to fail soon. He decided to install fifty-three more footings to completely replace the ground set posts.
The anchors all drew in tightly to the undisturbed original soil and they performed exactly as they were supposed to. However, remember that if your soil is littered with rocks and roots the Deck Foot Anchor may not work. But you can easily retract it and move it to a new location and try again. This can save you in most - but not all cases.
Jim was kind enough to write us and share his thoughts about this boardwalk project and how the Deck Foot Anchor worked for him.
"We realized even the existing posts that remained were rotting out and needed to be replaced. The guys were skeptical at first never having used them (Deck Foot Anchor). We were surprised and pretty impressed how they worked. They worked well and hopefully soil will be fine and the rest will work fine also."
Jim Hill - Chambersburg, PA
Channels dug for clearance of beams and room for footings
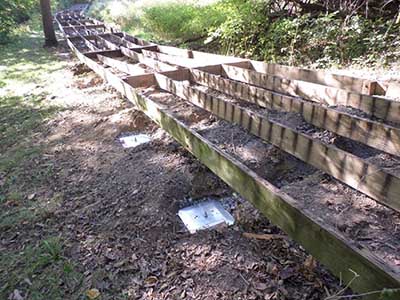
To save as much of the existing infrastructure as possible, the crew dug channels about 12"-18" below grade to allow the footings and beams to be installed. Initially each section of framing had two beams between each of the ground set posts.
Most of the long joists were still in good enough condition to be re-used and with the additional support of two more carrier beams this walkway would be in great shape once construction was completed.
a corded electric impact wrench and some elbow grease is all it takes
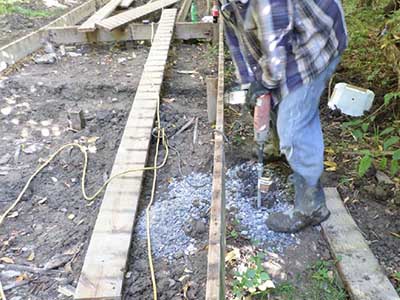
In case you are unfamiliar with how the Deck Foot Anchor is installed, check out one of Jim's carpenters driving a 36" auger into the Chambersburg soil.
He is using what looks like a Milwaukee ½" electric impact wrench. It is the same tool you might use on the lug nuts of wheels of your car. But a DeWalt impact wrench works great as well. A minimum of 350-foot pounds of torque seems to be the best. Some tools generate more, some less.
some tips on site preparation
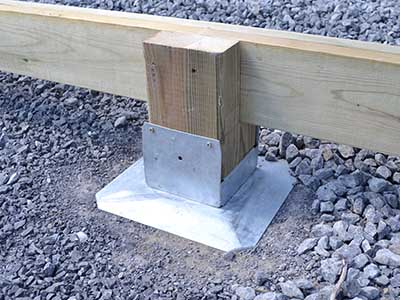
Jim's team did not do this here - and it is not critical for performance - but if you lay out landscape fabric over the site and cut holes in it to allow the auger to drive into the soil unfettered you will eliminate any weeds popping up under the walkway.
Then you would put down small, crushed stone around each footing. It should be like stone dust or perhaps ½" at the largest. This will compress nicely. Then around the infill areas you can lay down larger stone such as 3/4" as you see here.
The underside of the joists can be as little as 2" above grade. The top of the deck can be less than 12" above grade and you could cantilever the deck as much as 24"(but 18" is probably best) beyond the footing to completely hide them.
Leveling one beam to the next beam
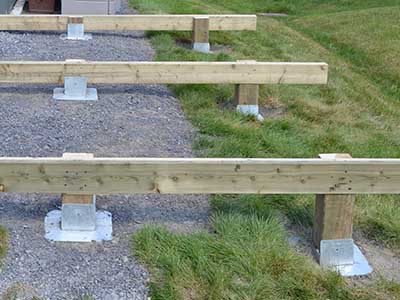
This is an image for a different job site, but it shows exactly the same things that Jim did on the boardwalk. A series of beams were attached to each pair of footings. The tops of each beam must follow some defined logic so that the walkway follows the elevation plane that you are trying to achieve.
The other point to note is that Jim set the beams directly into the post saddles rather than on top of support posts. The reason for that was to minimize the depth of the channel to be dug to accommodate the 2x8 beams and the 2" elevation of the post saddle.
Here is what you need to build a boardwalk with deck foot anchors
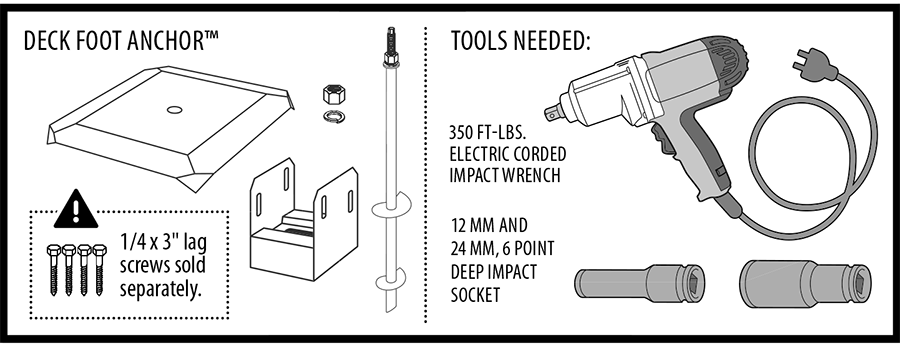
get a corded electric impact wrench
Aside from the other common tools like a hammer and a pry bar to remove old boards, this boardwalk was remarkably simple to build and the key tool that made the difference is the corded electric impact wrench that reliably generated about 350-foot pounds of torque.
People often think a battery powered impact wrench is up for the job. Today's batteries are incredible, and they may get you through one or two installs. But if you have 150+ footings to install like Jim, you will really appreciate having full power all the time with a corded tool.
and a 12mm six point socket is a must have for reliable driving power
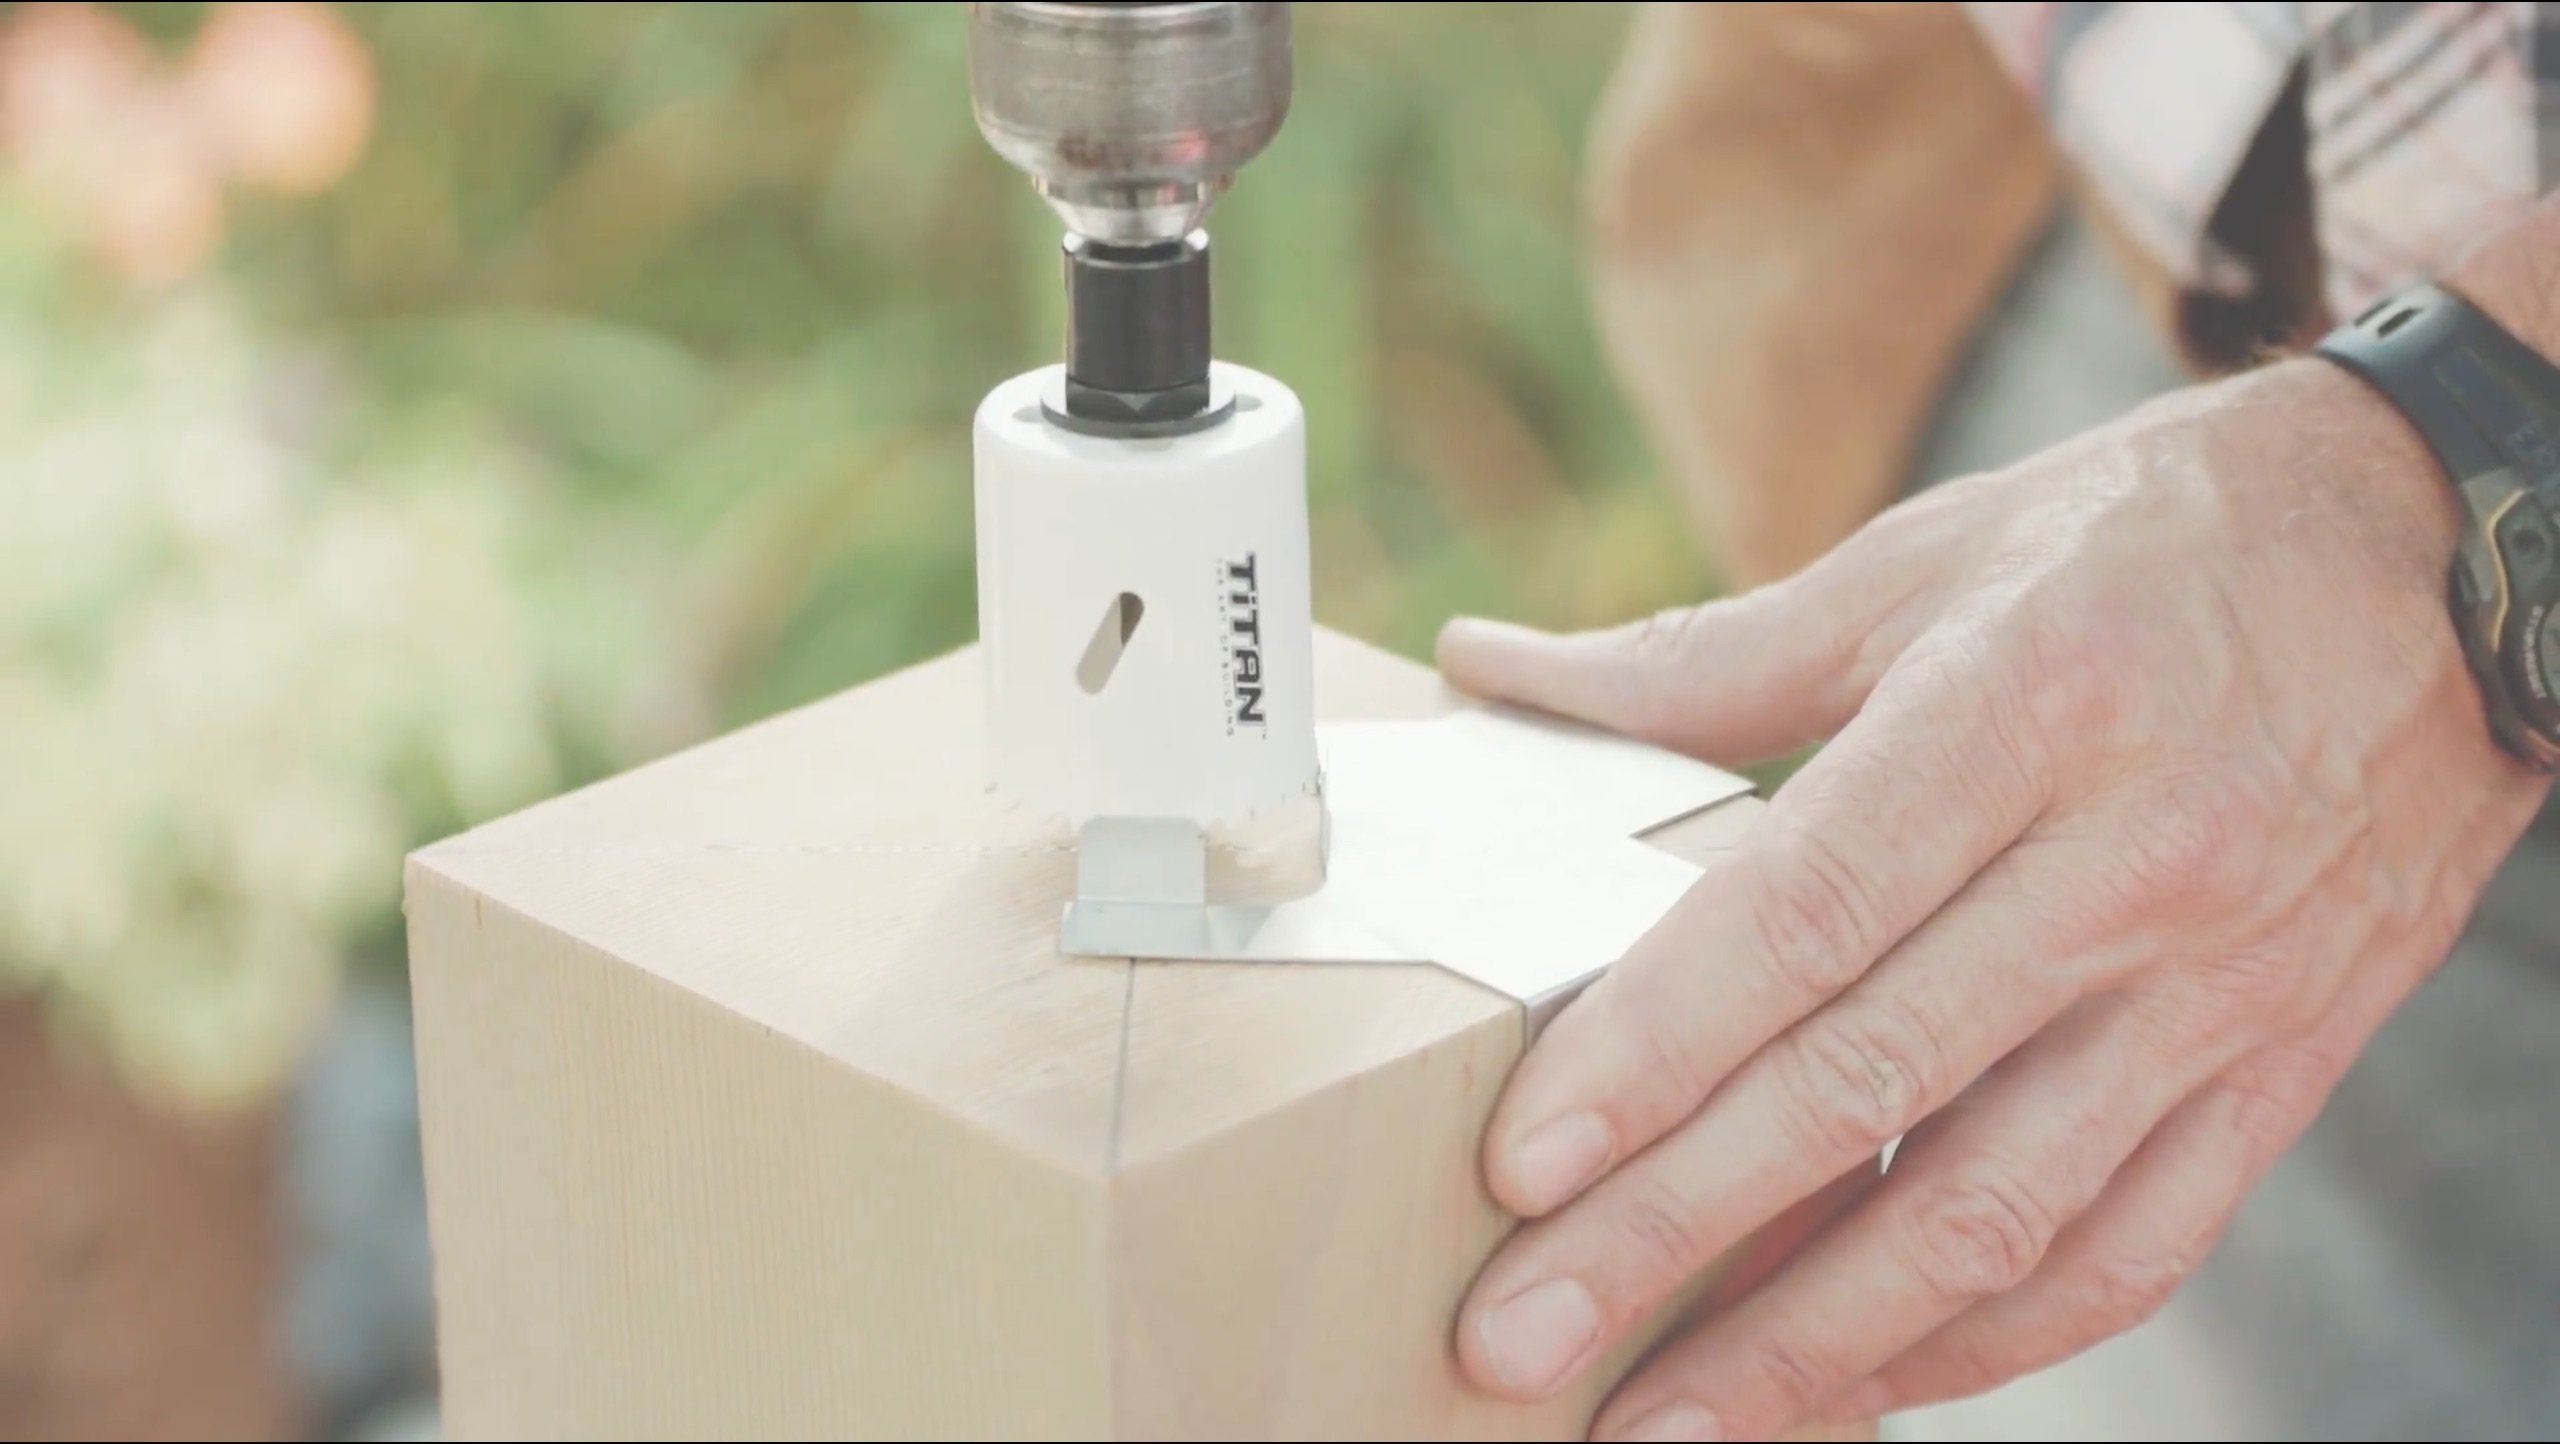
The other essential tools is a 12mm six-point impact socket. Do not use a 12-point socket. They do not grip as securely, and you might strip the hexagon drive head. Do not use a ½" six-point or 12-point socket either. The fit will not be as tight as it should be. You may successfully drive an auger into the ground but if you hit a hard spot you can just as easily strip the head.
what a difference between the old walkway and this re-constructed 400 foot boardwalk
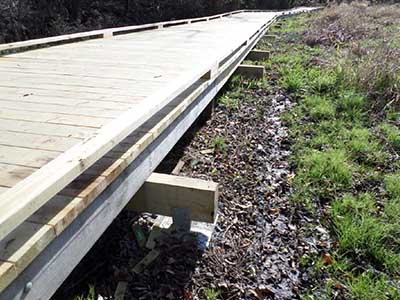
Straight as an arrow and built to last. This boardwalk will remain high and dry for decades to come. The Deck Foot Anchor is heavily coated with a hot zinc finish. So, it offers the next best performance to stainless steel.
Each footing can support a minimum of 19,000 lbs. That is a crazy number, and the soil can usually only bear about 1800 psf to 2000 psf. The point is that this structure is going to last a long time.
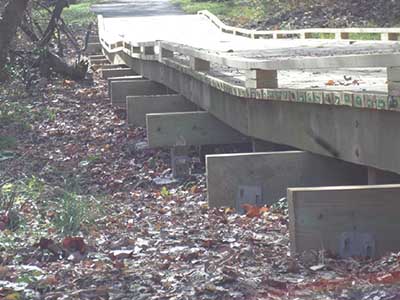
The walkway gently follows the lay of the land. Strong double 2x8 laminated beams are set every 8' with another deck foot under a support post every 16'. Remember, Jim had to remove the existing support posts that were set into the ground because they were so badly rotted.
This project was a success and ended up costing significantly less money because excavation, cement and associated labor was avoided. If you have a similar situation, this might be the right solution for your project.
We've done more work to improve and make the deck foot even more forgiving
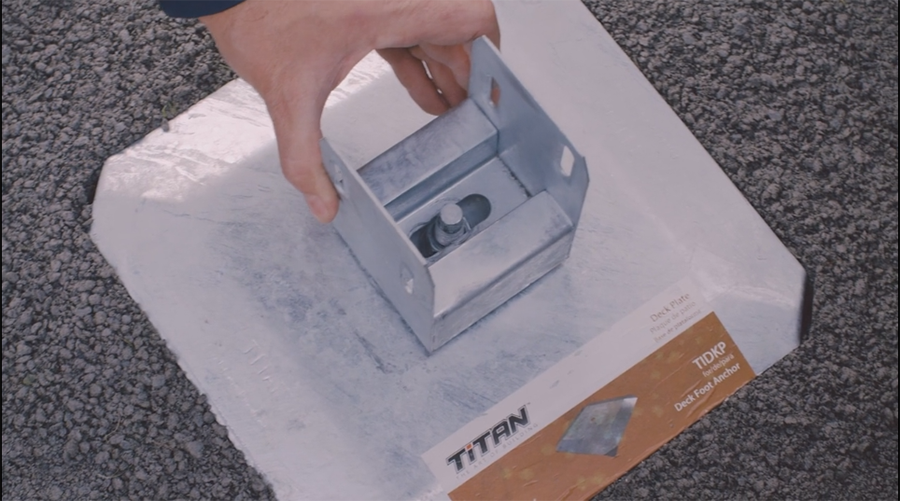
Jim's team used two footings per beam, so this new feature was not as critical. But we know that when you have more than two footings under a beam it is important to be able to drive the footings into the right location, so the straight beam hits all the post saddles.
This new lateral slide feature make sure that is easy to do. You can slide the post saddle bracket up to 2-½" left or right if you had the misfortune of installing it slight offline. So, do not sweat it! We have given you some wiggle room - literally.
Planning to build a boardwalk? the deck foot anchor may be a great solution.
We ask this question all the time because as much as we love this building solution it is not a silver bullet. There are soil conditions where an auger or spike type device will not function well.
If you are not sure about your soil condition, why not test it first and find out?
Here Is How to Test Your Soil
Take a piece of re-bar and drive it down into your soil in a few spots and see if it goes down easy or hits a rock. Use a sledgehammer and them pull it out by hand. Yes, it is a bit of work.
Or buy one of our single augers a test it out to be sure. You do not have to invest in a dozen footings unless you are confident.
Jim contacted us to let us know how the project went
"We used 36” Titan Deck Foot Anchors™ for stabilizing this 8’ x 400’ boardwalk in a mostly soft location along a stream in south central Pennsylvania. Ninety-eight anchors were installed to strengthen the structure. Fifty three more were installed to replace the existing ground-set posts discovered to be deteriorated. All the footing drew tight in the soil and we were pleased with the result.."
Jim Hill, VP - R. A. Hill, Inc.
Chambersburg PA
A project like this is within your reach
Every case study we share is a true story of a real customer. The put their faith in us and our products and shared their experience with us so that people like you can determine in your own time whether the Deck Foot Anchor is the right solution for the boardwalk or other project you are contemplating.
It is alright to feel excited. You should be. This kind of a project is within your reach. Now go get started!
Home > Deck Foot Forum > Case Study: Wooden Boardwalk With Deck Foot Anchors
