Deck Fascia Board Tip
Deck fascia board is often overlooked and just slapped on to the side of a deck rim joist.
This simple tip can add years and years of life to your deck.
I have started doing this to prevent water damage and staining the deck fascia just by adding a simple under deck drip edge.
Here is how to do it...
Prevent Rotting Fascia Board
Water dripping, staining and damage to the fascia or band board of a deck can easily be prevented with this little construction tip.
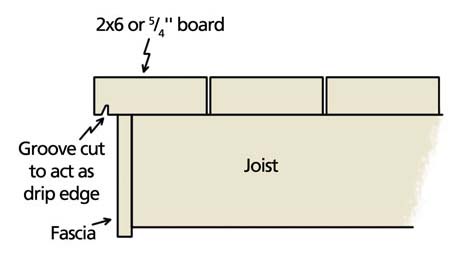
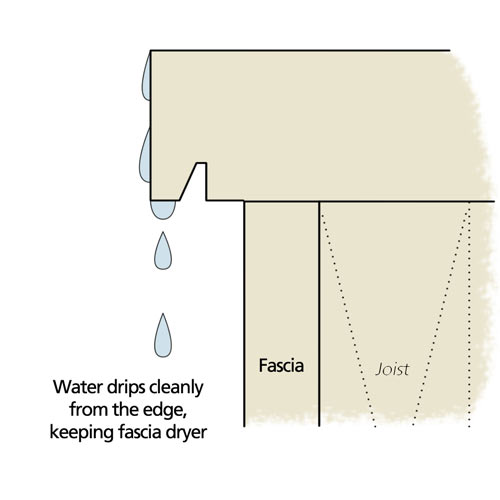
Using your table saw and either a sharp ripping blade or a dado blade, cut a groove down the length of the deck board starting about half the distance of the overhang you have set up against the edge of the deck.
Click the images to enlarge.
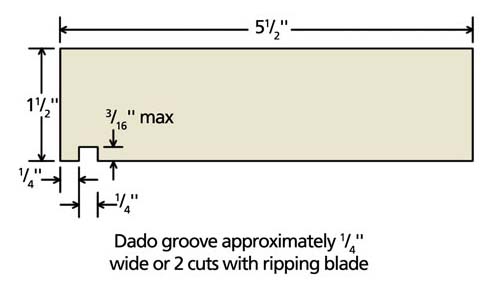
You can do two passes if you are using a ripping blade to create an inverted right angle triangle as the diagram shows. Or you can set up a dado blade to make a ¼" wide cut about ¼" deep.
What this does is stop water from hugging the underside of the deck board and moving towards the deck fascia board or band board and soaking the boards. You know the stains and dirt and mold that can develop when wood fiber remains wet all the time.
Even if you are using a synthetic fascia board, the dirt from the deck can get mixed in with the dripping water and can leave unsightly drainage patterns that you have to pressure wash off.
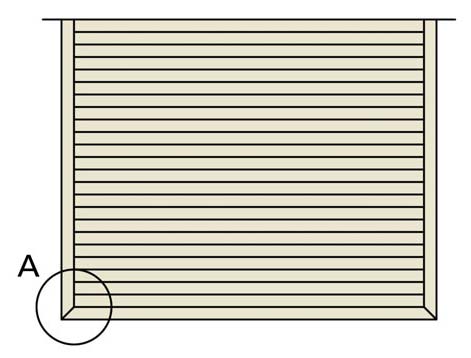
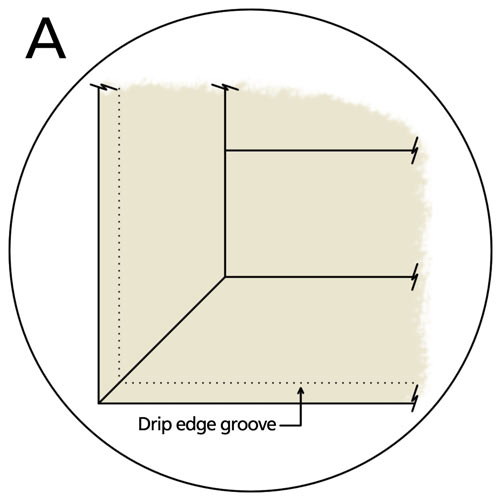
This is easy enough to do for decking boards that run parallel to the edge of the deck and particularly if you are using a picture frame border around the entire field of decking boards.
It's quick and easy setting up the table saw with a rip fence and running four or five boards through.
Click the images to enlarge.
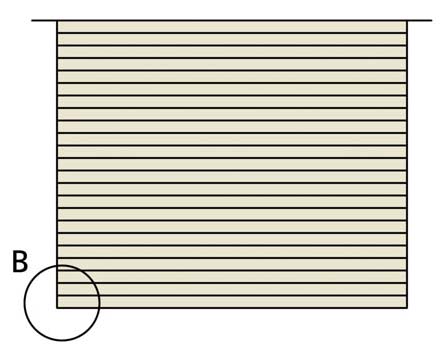
But it's a bit trickier for boards that are perpendicular to the edge of the deck.
If that is the kind of decking pattern you are going with then I suggest laying out the deck board(s) in question on the framing and determining exactly how much they will over hang and cutting them to their final length.
Click the images to enlarge.
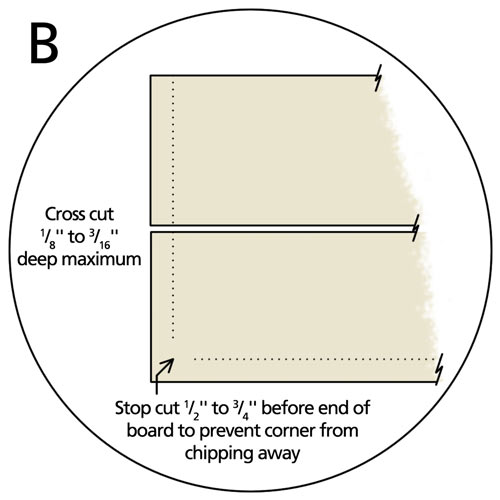
You can cut the grooves one of two ways.
I recommend you use a cross cut sled fitted for your table saw and if the boards are long, have a partner hold the other end or a work bench wide enough to cover the movement of the board over the cutting distance.
Or if you have a lightweight finishing router with a guide fence attachment, one person can easily cross cut groove the boards accurately and neatly.
If the groove is not too deep, (¼" max) and it doesn't have to be deep to be effective, it will not substantially weaken the bottom edge of the deck board.
You will appreciate this as a homeowner with longer deck life, less cleaning and a better looking product. Your clients will appreciate your attention to detail and a better finished deck for the years to come.
If you have a helpful tip you would like to share just contact us. If we publish it we will be sure to credit you and link back to your site.
This article is from the 2011 Spring issue of our Deck INSIDER newsletter. If you're interested in getting knowledge, tips, and tricks about all aspects of decks straight to your email, sign up below or click here to learn more.
Sign up for our newsletter here.
Home > Building A Deck > Deck Fascia
